Before moving into a new home, note the location of the main shut-off valve and drain (in some cases, the shut-off will be located outside the house). You should also get acquainted with sewer line access points, in case you need to conduct periodic clean outs. Note that apartments and condos may not have their own dedicated shut-off valves.


RESIDENTIAL PLUMBING
Trusted expert residential plumbing & repair, serving homes.

COMMERCIAL PLUMBING
Commercial plumbing & boiler services of any kind throughout the area.

SERVICE & REPAIR
Preventative maintenance & routine care, with detail-oriented team.

WHAT WE OFFERExplore Our Services & Solutions
PIPE LEAKING
Your sewer pump is essential for removing sewage from
your sump pit to your septic tank or sewage system.
your sump pit to your septic tank or sewage system.
DRAIN CLEANING
If your tub or sink is draining slower than usual, or won’t
drain at all, your drain is either clogged or damaged.
drain at all, your drain is either clogged or damaged.

WHAT WE OFFERFor Companies Only: Buy Italian Flues
TOILET LEAKING
If you live in an apartment building, you’re sure to see a
sign put up by management to keep your faucet dripping.
sign put up by management to keep your faucet dripping.
BATHTUB INSTALLATION
If your old bathtub has seen better days but you’re
hesitating to replace it because of the high costs.
hesitating to replace it because of the high costs.

WHAT WE OFFERNeed Professional Help With Your Project?
OVERFLOWING TOILET
After you try to wipe away debris by hand, it’s time
to turn to a chemical drain cleaner.
to turn to a chemical drain cleaner.
SOLDER COPPER
You’re ready to do some plumbing work in your house,
and have to learn how to solder copper.
and have to learn how to solder copper.
Are you interested in an estimate?
Regular plumbing care
will save your time & money
0123456789001234567890%
Household water usage that goes to toilets, showers & faucets
012345678900123456789001234567890gal
The average US family can waste from household leaks
012345678900123456789001234567890$
Yearly savings by servicing your water leaks with 24 hour services available
FIX IT YOURSELFQuick tips & tricks
1
10 Plumbing Tips Everyone Should Know
-
Know the Location of Shut-Off Valves
-
Don’t Puncture Pipes
Are you planning to drill holes or pound nails into your walls, floors, or ceiling? First determine if there are any supply or drainage pipes behind your work area, since you don’t want to accidentally puncture them. You may be able to locate pipes behind walls with an inexpensive stud finder. Alternatively, you could invest in an endoscopic camera, which can be snaked into the walls.
-
Find Out What’s Flushable
Homeowners shouldn’t use their toilet as a trash can, since flushing anything except toilet paper leads to nasty clogs. Even “flushable” baby wipes can back up the system!
-
Don’t Put Garbage Down the Drain
Never dump coffee grounds, food debris, bacon grease, vegetable peelings, or starchy foods like rice or potatoes down the kitchen drain; they will almost certainly clog your pipes. It’s also smart to read the manufacturer’s manual for your garbage disposal to know what, exactly, the unit can handle.
Related: 10 Things Always to Keep Near Your Kitchen Sink
Photo: istockphoto.com
-
Take the Plunge

Invest in a high-quality plunger to clear clogs in toilets, sinks, and drains. If you’re planning to clean sink traps, use a plunger to push most of the water out before removing the trap. The task will be a lot less wet and messy.
-
Pull Out the Vacuum
When you’re trying to dislodge a clog caused by a small, hard object (like a child’s toy, toothbrush, or comb), rely on a wet-dry vacuum. It’s more effective to suck the object out. A plunger will only push it deeper into the drain, making it more difficult to remove.
-
Don’t Ignore Leaks

That steady drip, drip, drip of a fixture symbolizes money going down the drain. In fact, a leaky faucet typically wastes up to eight gallons of water per day, while a running toilet can waste 200 gallons per day. Fix small leaks promptly before they become big—and costly—problems.
-
Never Over-Tighten Fittings
A common DIY plumbing mistake is over-tightening fittings and connections, which leads to broken bolts and stripped screws. Remember this adage: “hand-tight is just right.”
-
Make Friends with Plumber’s Tape

Plumber’s tape (also called Teflon tape) is used to seal pipe threads to prevent leaks around joints and fittings. You should typically wrap plumber’s tape three times around the pipe threads before sealing. Also note that white tape is designed for common household plumbing projects, while yellow is for gas line connections.
-
Always Check for Leaks
After every plumbing project, check for leaks by running water through the system, then opening and closing all valves and drains. Even professional plumbers may miss a small leak and need to reseal a connection.


2
PEX vs. Copper: Which Pipes are right for My Home
PEX vs. Copper: Which Pipes are Right for My Home?
Get the 411 on two popular choices for water supply pipes to make the right choice for your plumbing project.

Photo: istockphoto.com
Once the top choice for all water supply pipes, copper has been nudged a bit to the side by flexible pipes made from cross-linked polyethylene, “PEX” for short. While copper still plays an important role in water pipes for new construction, PEX pipe is quickly becoming the choice for remodeling and retrofitting. Both copper and PEX come with a few advantages and disadvantages, so if you’re looking to replace your home’s current water supply system, keep reading. This cheat sheet on PEX vs. copper outlines the main differences between the two materials so that you can make an educated decision for your plumbing project.
RELATED: 10 Plumbing Tips Everyone Needs to Know
Copper lasts longer than PVC pipes.
It’s tough to beat copper pipes for longevity, which on average last 50 to 70 years, compared to PEX, which has an expected lifespan of 30 to 50 years. PEX’s life expectancy can be shortened by the use of extremely hot household water (180 degrees Fahrenheit or higher) or if the water in the home contains high levels of chlorine. Copper’s life can be shortened by highly acidic water. When installed under typical conditions (i.e., your home is connected to a municipal water system), copper can be expected to outlast PEX by about 20 years. If you’re on a private well, have your water tested prior to retrofitting your water supply system. Local County Extension Offices can test well water to determine whether it’s high in acid or chlorine.
Copper is also costlier.
In recent years, the cost of copper has risen substantially due to its increased recycle value, so products made from copper have increased as well. On average, installing copper water pipes will be 58 percent to 68 percent more expensive than PEX. For example, you could expect to pay $8,000 to $10,000 to have a plumber replace the old pipes with new copper pipes in an average, two-bath, 1,500-square-foot home versus $4,000 to $6,000 for PEX.

PEX requires fewer connections.
Since copper is rigid, it must be cut to size and have elbow fittings installed every time it comes to a corner, such as where it turns from a vertical run between studs to a horizontal run to meet a sink. More connections mean more installation labor. PEX, on the other hand, runs continuously all the way from a water-distribution panel (called a manifold) to each fixture (tub, sink, etc.). PEX bends easily around corners so no additional connections are necessary.
In a remodeling project, flexibility is a big plus, because the PEX pipe can be snaked through finished walls without the need to cut out drywall. To have new copper pipes installed in a finished home, the drywall must be removed to give the plumber access to make connections.

Photo: istockphoto.com
PEX offers a central shutoff.
Most water fixtures, such as tubs, sinks, and showers, have individual shut-off valves located somewhere nearby. In the case of a sink, it’s usually in the vanity cabinet below, but shut-off valves for tubs and showers are often located behind access panels held in place with screws, making it a chore to access them. With PEX, every pipe connects to the water-distribution manifold (usually located near where the water main enters the house), and each individual pipe has its own shutoff valve directly on the manifold. The manifold features labels for each shutoff valve, such as “Bathtub” or “Laundry Room Sink,” so turning the water supply off and on for any fixture is simple.
Copper is more likely to freeze and break.
One of the biggest disadvantages of copper pipes is their tendency to crack if the water inside freezes and expands. Having a degree of flexibility, PEX is able to expand if the water inside it freezes, making PEX more resistant to freeze-breakage. That said, in new house construction, there’s little risk from copper pipes freezing and breaking, because today’s plumbing practices are designed to keep the pipes insulated and safe. The problem is more common in older homes that lack adequate insulation. If you live in a cold region and your home is under-insulated—or if you’ve had trouble with water pipes freezing in the past—it might be a good idea to go with PEX when having the pipes replaced.
RELATED: Prevent Freezing and Bursting Pipes—Here’s How
PEX is more DIY-friendly.
For DIYers, PEX is the easier type of pipe to install. Making the connections necessary in copper pipes requires the use of a torch to solder and seal the fittings. PEX pipes connect with a number of easy-to-use fittings, including quick-connect fittings that connect just by pushing them together, crimp fittings (requiring a special crimp tool), or clamp fittings (calling for a clamp tool). Manufacturers of each type of fitting usually feature detailed installation videos on their websites, and since PEX is flexible, you’ll only need to make two connections for each fixture—one at the manifold, and the other at the fixture itself.
Note: Permission to install new plumbing in your own home depends on the building codes in your community, so contact your local building authority before you start.
4
How To: Turn Off Your Home’s Water
Don’t wait for a plumbing emergency! Learn to turn off your home’s water supply now with this guide to a potentially money-saving dry run.
So it makes sense to familiarize yourself now with how to turn off the water supply (and educate family members as well) to make regular maintenance easier and even save hundreds or even thousands of dollars of repair costs in a worst-case scenario.
RELATED: 10 Plumbing Tips Everyone Needs to Know
As there’s no one exact place in every house where water supply valves are located, either, it could take some time to find them—time that you won’t have if water is rapidly soaking through the second-floor ceiling. So we’ve shared tips on how to turn off water to the entire house or just to specific fixtures and appliances, as needed. Learn the basics of both and you’ll be prepared for whatever plumbing predicament may arise.
Turn off your home’s main water supply.
Here’s how to switch off the water main shutoff valve.
STEP 1: Locate the valve.
The water main shutoff valve could be in a number of places, depending on the age of your home and the climate of your location. The knob will either be a gate valve, which looks like a circular spigot, or a ball valve, which has a lever-style handle.
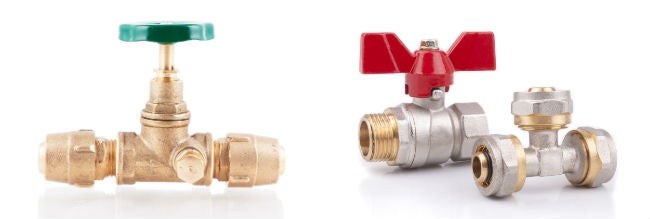
Photo: istockphoto.com
Look in these areas:
- Inside the house. Water supply pipes from the city typically run from the street side of your house to the indoors. So check out utility areas—such as the garage, laundry room, or basement—along exterior walls facing the street. A likely place to start looking is near your water heater. In a basement, the pipe will likely be at eye level; on main floors, it will often be located lower down.
- Outdoors on an exterior wall. In some warmer climates, the shutoff valve may be located outside the home on an exterior wall. Start looking for it near your outdoor faucet.
- Outdoors buried near the street. If you can’t find the valve in or around the house, it’s time to hit the street. There’s usually a water supply shutoff valve next to your water meter outside where the city can easily turn on or off your water. It will likely be below an access panel buried in the ground, near the street. The access panel may require a special tool called a meter key (sold at most hardware stores) to remove the cover. There may be two valves, one for the homeowner (on the side of the water meter closest to the house) and one for the city (on the side of the water meter closest to the street). Or there may just be one valve, for the city’s use. It may not be permitted for homeowners to use this valve, so contact your water utility company to check.
STEP 2: Turn off the water.
To turn the water supply off, give a gate valve a few turns clockwise until you can’t turn it any longer. For ball valves, turn the lever clockwise 90 degrees.
STEP 3: Run the taps.
Relieve the pressure in the pipes by draining the water that’s already in them. Turn on a sink located in the lowest level of your home, so water in the pipes from the floors above drain all the way down. Make sure to open both the hot and cold taps and run them until they empty fully.
STEP 4: Turn the water back on.
Once repairs are complete, turn the water back on by twisting the valve counter-clockwise. To ensure that it’s back in good working order, turn on a faucet and allow a few minutes for the water to reach it.
Bonus tip: Label the valve for the next time it is needed, putting arrows that indicate which way to turn in order to shut off and turn on the water.
Or, turn off the water supply to specific fixtures as needed.
If there’s just one fixture in your home that is malfunctioning, you may be able to turn off the water to that particular spot. That way, you can continue to use the plumbing in the rest of the house while addressing the problem. Appliances and fixtures like dishwashers, refrigerators, washing machines, toilets, and sinks usually have their own individual shutoff valves that are helpful in times of repairs. Look for a small round or oval knob near the appliance or fixture, usually attached to flexible tubing, which you can turn clockwise to stop the water flow.
5
How To: Unclog a Sink Drain
-
Check the “P-Trap”

My first line of defense for unclogging a stopped-up drain is to check the “p-trap”—the elbow-shaped pipe under the sink. Be sure to put a bucket under the pipe before removing it. Unscrew the connectors securing the pipe to the sink drain and the wall, and check for obstructions. If the p-trap isn’t clogged, there’s probably GUNK inside the drain. Brace yourself!
Photo: Pete Fazio
-
Unscrew the Pivot Nut

Before you can unclog the drain, you need to remove the stopper. To do that, look in the cabinet under the sink for something that looks like this. Unscrew the pivot nut connected to the drain pipe (the thing in the photo that is connected to the metal strip with holes) and pull the rod out of the pop-up assembly (be careful not to lose any parts).
Photo: Pete Fazio
-
Remove the Stopper

Once you’ve unscrewed the pivot nut, you should be able to lift the stopper out of the drain. It will most likely look disgusting, like this. When you finish dry-heaving, it’s time to use a “hand snake” to clean out the inside of the pipe. What’s a hand snake? Click ahead to find out.
Photo: Pete Fazio
-
The Hand Snake

This is a “hand snake”, a handy little item you can get at any hardware store. To utilize, you push it into the drain while cranking the handle. The cranking causes the snake to spin around in your pipe, grabbing onto obstructions or scraping gunk out of the pipe.
Photo: Pete Fazio
-
The Gunk

After using the snake, the sink will pretty much look like this, but you will have discovered the culprit responsible for the problem. Give it a few more hits with the “snake” and the pipe will be clean, the smell will be gone, and the drain problem—something of the past.
Photo: Pete Fazio
-
Clean the Stopper

The final step is to clean and re-install the stopper. That means going back under the sink and re-connecting the metal strip with holes with the pivot nut. Make sure the drain stop is functioning again. You’re back in business.


Customer experience
testimonials
WHY CHOOSE USTrusted Plumbing Professionals
Courtesy may not be the first thing people think of when it comes to plumbing, but for us, it's one of the most important tools we carry.
Nothing wears on homeowners like the idea of handling plumbing problems. From the water heater to sewer line, we take the pressure off of you (and put it back in your shower lines). Our plumbers are the most recognized professionals in the world because we’re committed to amazing service and nothing wears on homeowners like the idea of handling plumbing problems.
CALL ANYTIME... DAY OR NIGHT

Company in numbers
Mauris porttitor vestibulum orci nullam tincidunt congue nunc
012345678900123456789001234567890
0123456789001234567890
012345678900123456789001234567890
012345678900123456789001234567890
OUR LOCATION
12164 Lull St
Los Angeles, CA 91605
WORKING HOURS
Mon-Sat 9AM-6PM
Sat 9AM-3PM